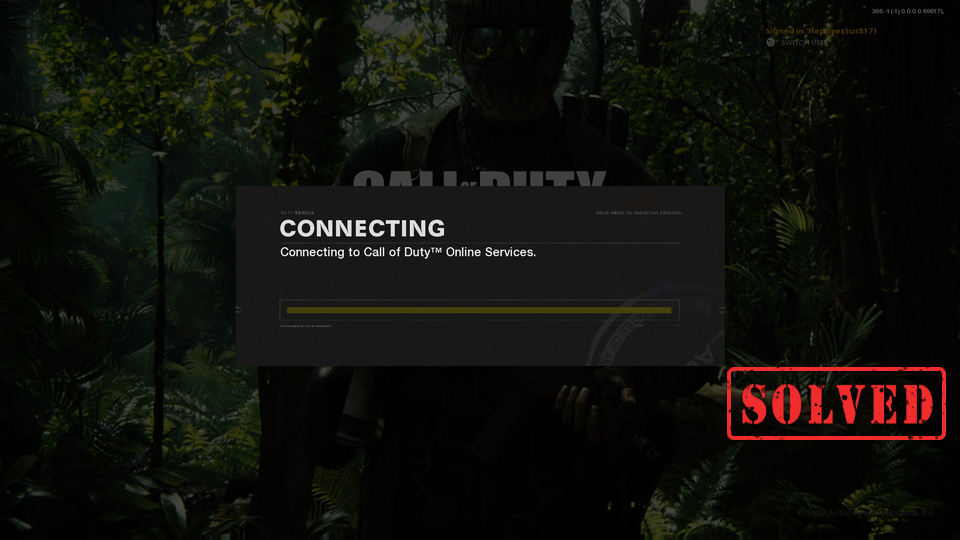
Call of Duty: Black Ops Cold War is the game that many players would pick. But many players are struggling to get on the servers or play online. And there is an error message ”Cannot Connect to Online Services” or it’s stuck on the “Connecting to Call of Duty Online Services” screen. If you’re on the same boat, don’t worry. In this article, we’ll point you in the direction of what is going on and how to fix it.
Before diving into any troubleshooting, simply restart your game and router. If this didn’t work, try these fixes:
- Check your game’s server status
- Allow your game through Windows Firewall
- Run your game and launcher as an administrator
- Update your network adapter driver
- Flush your DNS and use Google’s instead
- Make sure your Activision and Blizzard accounts are linked
Fix 1: Check your game’s server status
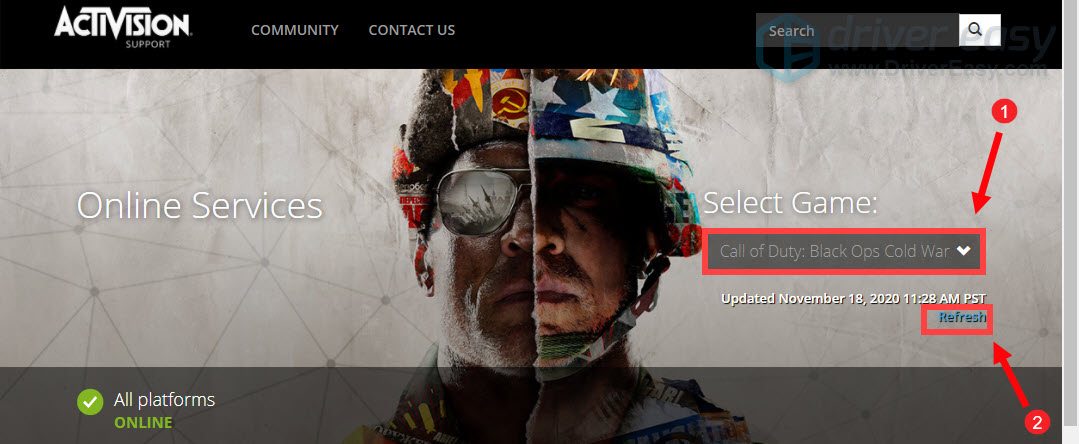
Game servers may sometimes go down and you cannot connect to online services. To check if that’s your case, visit the Activision Online Services page. Once you go there, take these steps:
- In the Select Game: section, click on the down arrow game to select Call of Duty: Black Ops Cold War. Then click Refresh.
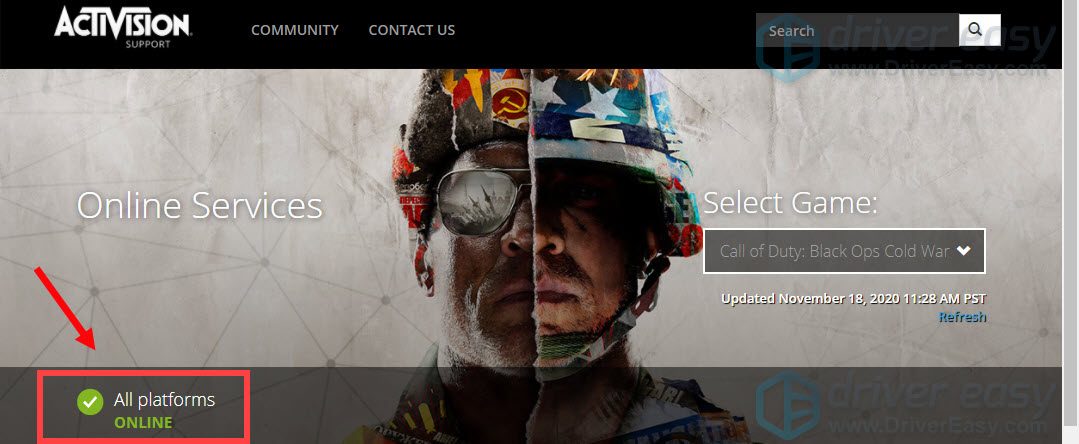
- If it shows all platforms are ONLINE. It means that there is an issue with your internet connection.
Fix 2: Allow your game through Windows Firewall
The error message is mainly associated with a server or internet connection issue. So in order to fix it, you need to first make sure that your firewall is not blocking your game. To do this, take these steps:
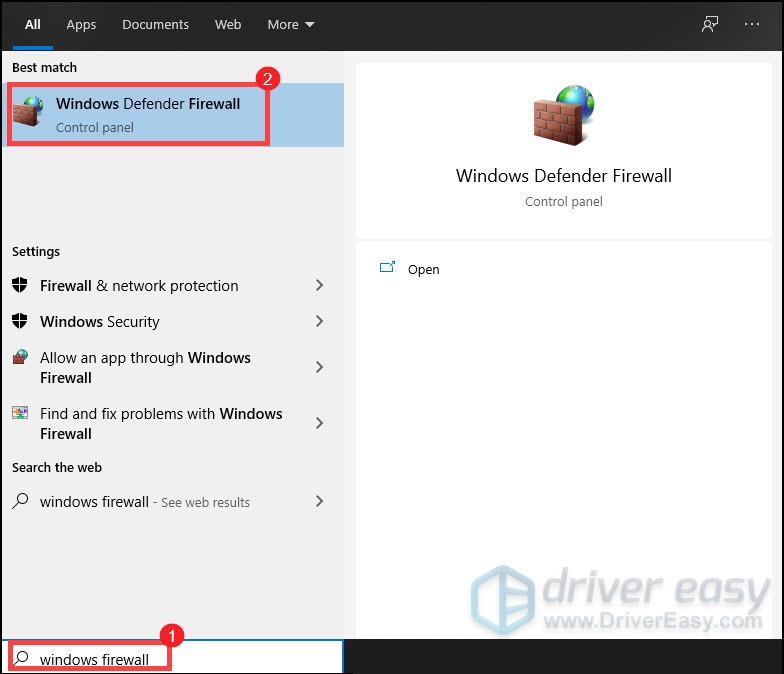
- On your keyboard, press the Windows logo key to open the Start menu. Then type in windows firewall and click Windows Defender Firewall from the results.
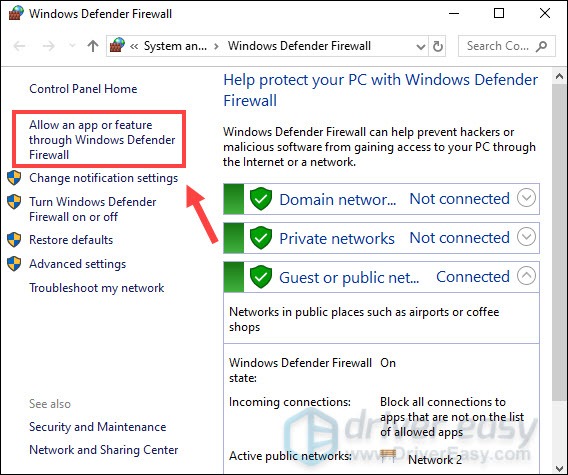
- From the left panel, click Allow an app or feature through Windows Defender Firewall.
- Now you need to scroll down until you can find Call of Duty: Black Ops Cold War. And also make sure it’s ticked for Private.
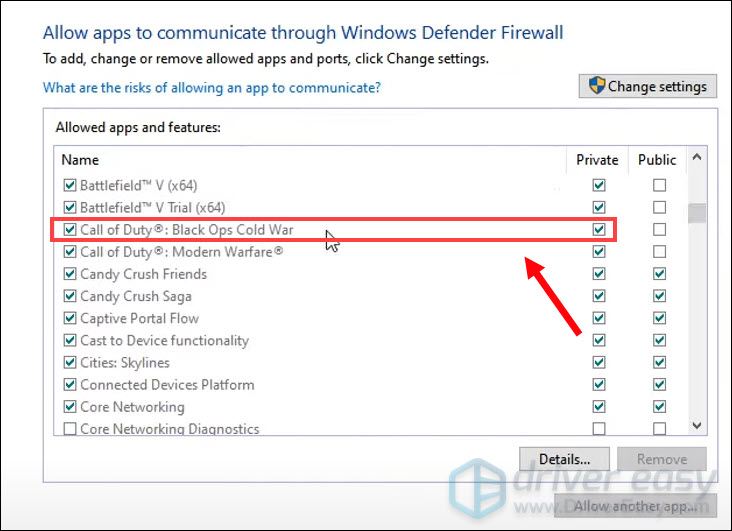
If your game isn’t on the list and it’s not ticked for Private, it means it doesn’t have access to the internet. If that’s your case, take these steps:
- Click on Change settings > Allow another app….
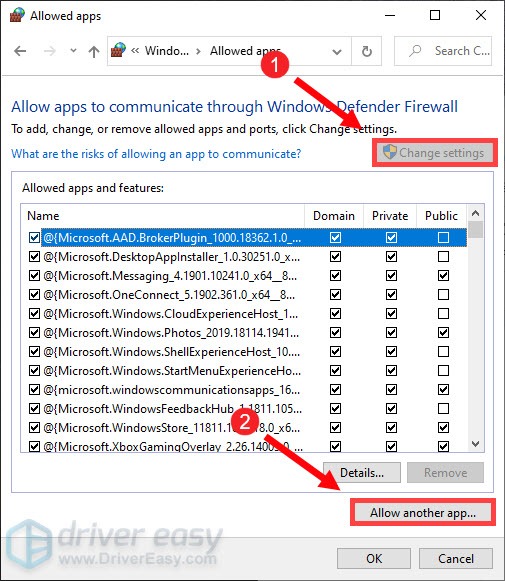
- Then browse for our game and follow the instructions to allow your game through the firewall.
If you are not sure where your game is installed, take these steps:
- Open BLIZZARD.
- Click on GAMES and head to Call of Duty: BOCW. Click on Options > Show in Explorer. Then you’ll be brought to your game’s installation directory.
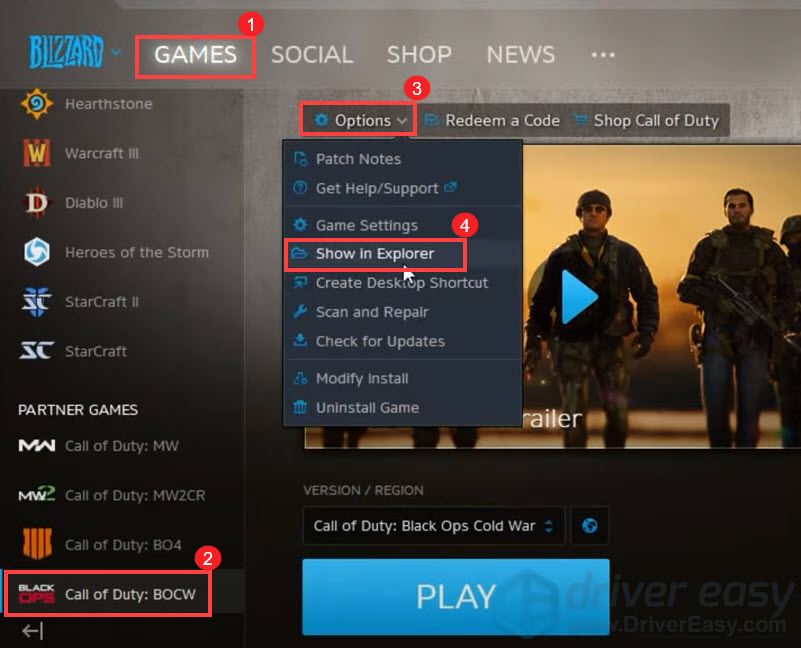
- Open the folder Call of Duty Black Ops Cold War. Then you’ll find BlackOpsColdWar.exe.
After you’ve added your game to the list and ticked it for Private, try to boot up your game. And you should be able to connect.
Fix 3: Run your game and launcher as an administrator
Granting an application with administrative rights can resolve many issues. If you constantly get the error message “Cannot Connect to Online Services”, you should run your game and launcher as administrator.
Run your game as an administrator
- Open BLIZZARD.
- Click on GAMES and head to Call of Duty: BOCW. Click on Options > Show in Explorer. Then you’ll be brought to your game’s installation directory.

- Open the folder Call of Duty Black Ops Cold War. Then you’ll find BlackOpsColdWar.exe. Right-click it and select Properties.
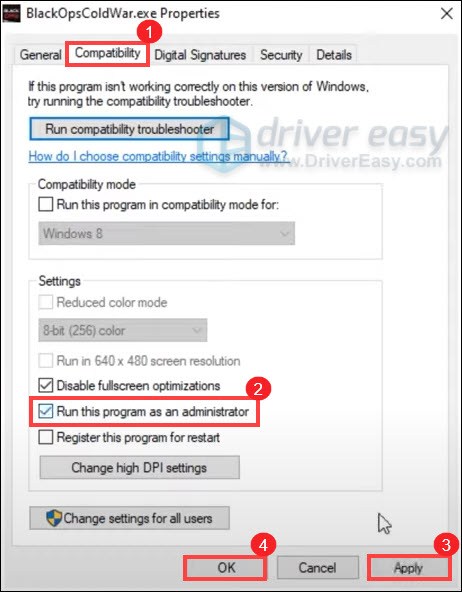
- Select the tab Compatibility and check the box next to Run this program as an administrator. Then click Apply > OK.
Run Blizzard launcher as administrator
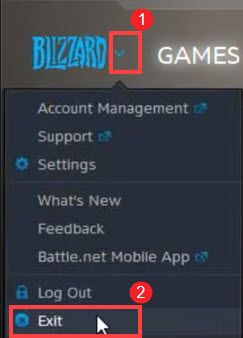
- Exit your launcher.
- On your keyboard, press the Windows logo key to open up the Start menu. Then type in battle. From the results, find the app Battle.net. Then click Run as administrator.
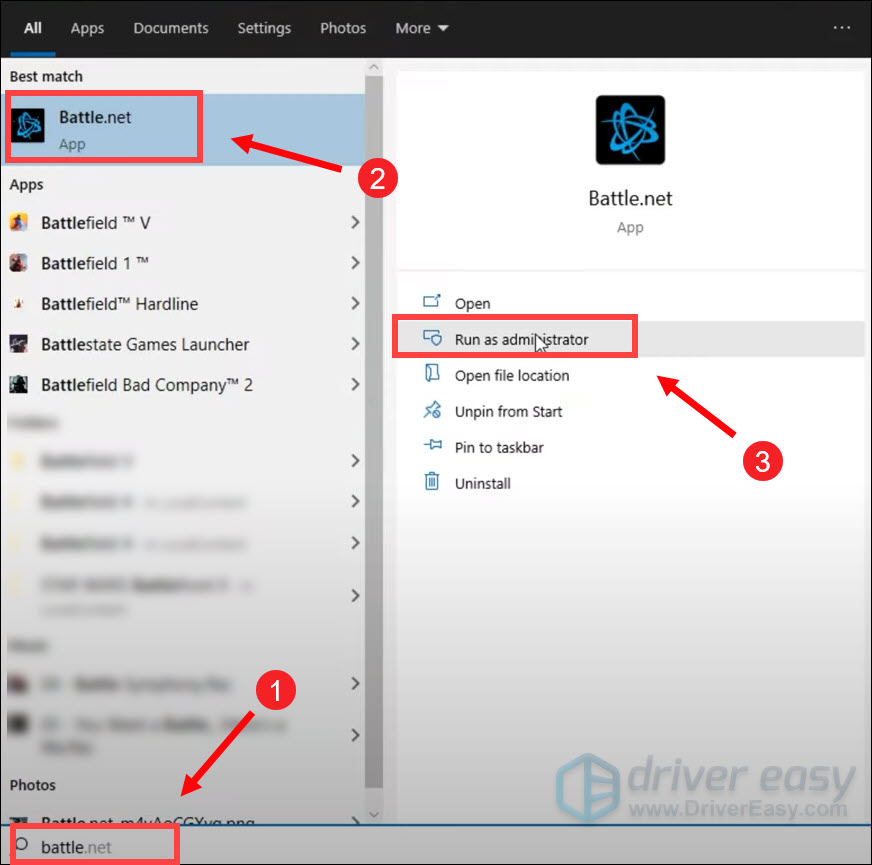
Then it’ll launch in admin mode.
Fix 4: Update your network adapter driver
This error message is related to network or server connectivity issues. So your outdated network adapter driver can be the culprit and make your game unplayable. To fix it, you’re supposed to update your network adapter driver, especially if you can’t remember when was the last time you update it.
How you can update your network adapter driver
To update your network adapter driver, you can do it manually by going to the manufacturer’s official website, downloading, and installing the correct network driver for your system.
OR
You can do it automatically with Driver Easy. Driver Easy will automatically recognize your system and find the correct driver for it. You don’t need to know exactly what system your computer is running or risk downloading and installing the wrong driver.
You can update your drivers automatically with either the 7 days free trial or the Pro version of Driver Easy. It takes just 2 clicks, and you get full support and a 30-day money-back guarantee with the Pro version:
- Download and install Driver Easy.
- Run Driver Easy and click the Scan Now button. Driver Easy will then scan your computer and detect any problem drivers.

- Click the Activate & Update button next to the flagged device to automatically download and install the correct version of this driver.
Or click Update All to automatically download and install the correct version of all the drivers that are missing or out of date on your system (You’ll need the Pro version for this – when you select Update All, you’ll get a prompt to upgrade. If you’re not prepared to purchase the Pro version yet, Driver Easy provides a 7-day trial at no cost, granting access to all Pro features like fast downloads and easy installation. No charges will occur until after your 7-day trial period ends.)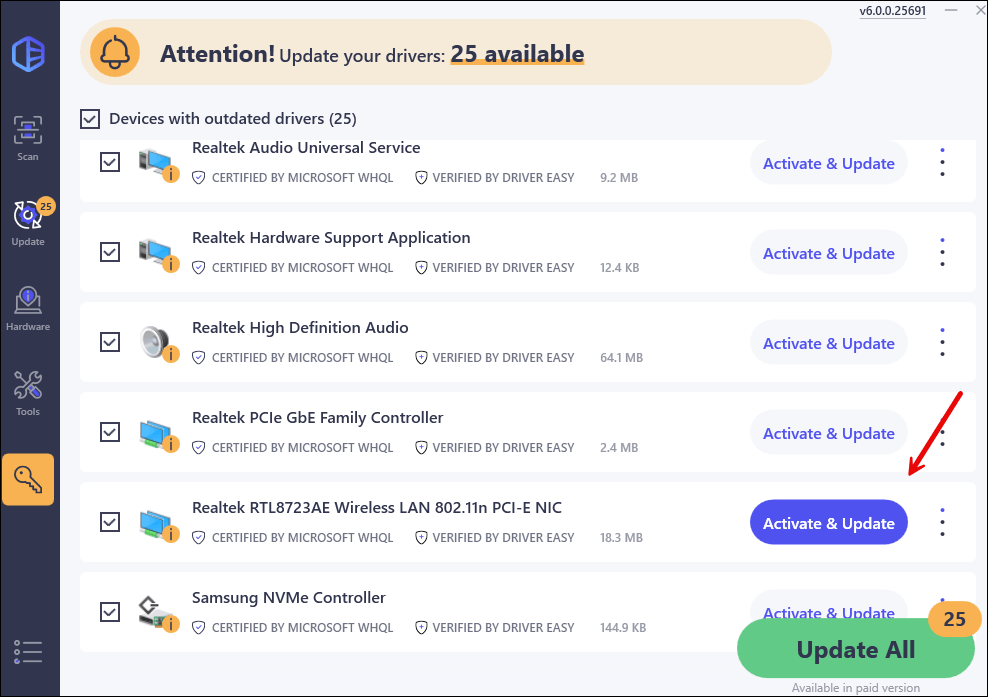
- After updating, restart your computer to take effect.
After updating your drivers, restart your computer for them to take effect.
Fix 5: Flush your DNS and use Google’s instead
Sometimes your ISP-supplied DNS server might be slow or not properly configured for caching, which can effectively slow your connection and even cause problems like games not connecting to server error. Switching your DNS can result in better connectivity and performance for your internet connection. Here we recommend using Google DNS.
To see if a new DNS address helps, you can follow the instructions below:
- In the Windows search box, type cmd. Then click Run as administrator.
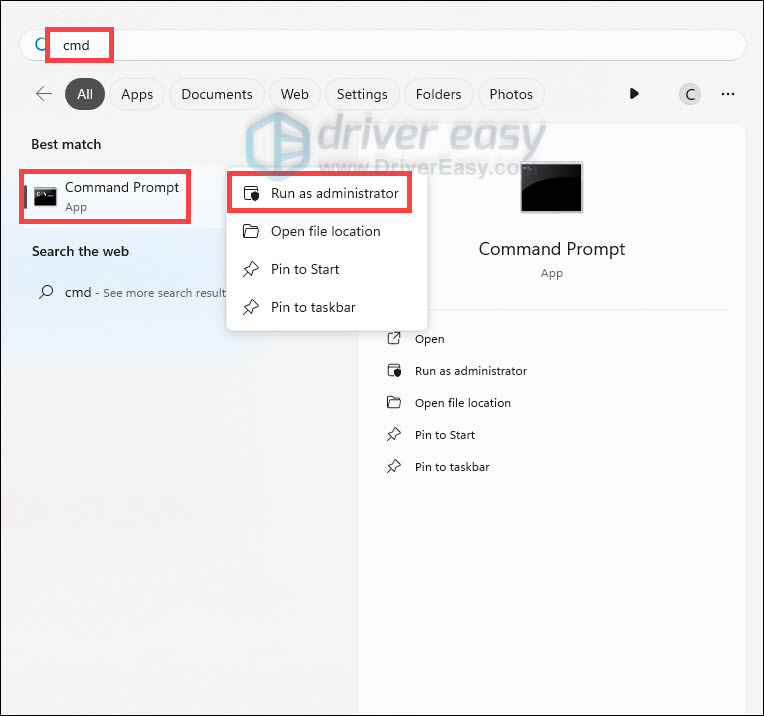
- Click Yes to continue.
- In the command prompt window, type ipconfig /flushdns and press Enter.
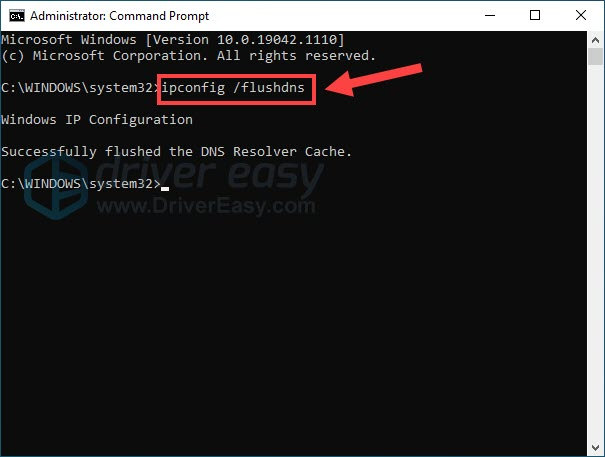
- Type ipconfig /renew and press Enter.

- On your keyboard, press the Windows key and R key at the same time. Type control and hit Enter.

- View by Category, and select Network and Internet.
 .
. - Select Network and Sharing Center.

- Click the Internet connection you’re using, then select Properties.

- Click Internet Protocol Version 4 (TCP /IPv4) > Properties.

- Click Use the following DNS server addresses:
For Preferred DNS server, type 8.8.8.8
For Alternate DNS server, type 8.8.4.4
Check the box next to Validate settings upon exit and then click OK.
See if COD Cold War’s can’t connect to server error remains. If so, please move on.
Fix 6: Make sure your Activision and Blizzard accounts are linked
If you haven’t linked your Activision and Blizzard accounts, you may not be able to connect to the online services. So to eradicate the error message, follow the steps below to link your accounts:
- Head across to activision.com.
- In the top right, click LOGIN.
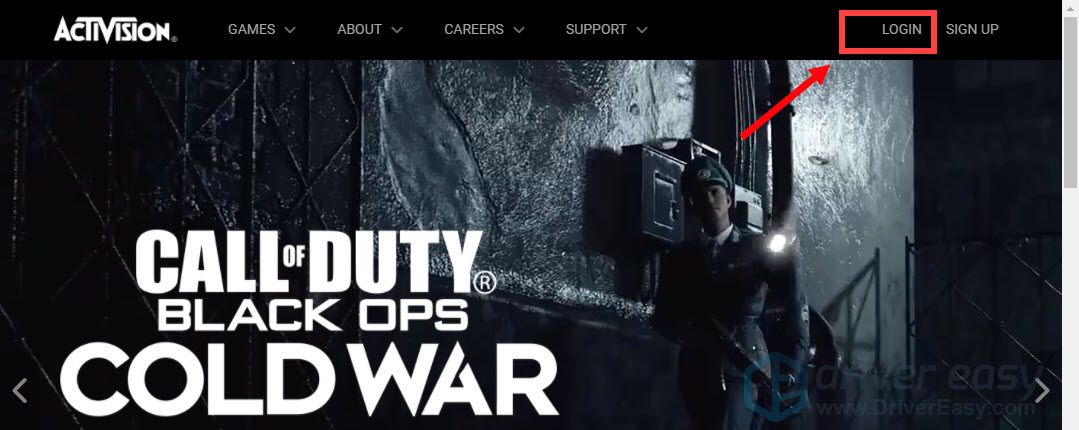
- Then you’ll be redirected to the login page. Now simply enter your details.
- Once you’re logged in, click PROFILE in the top right.
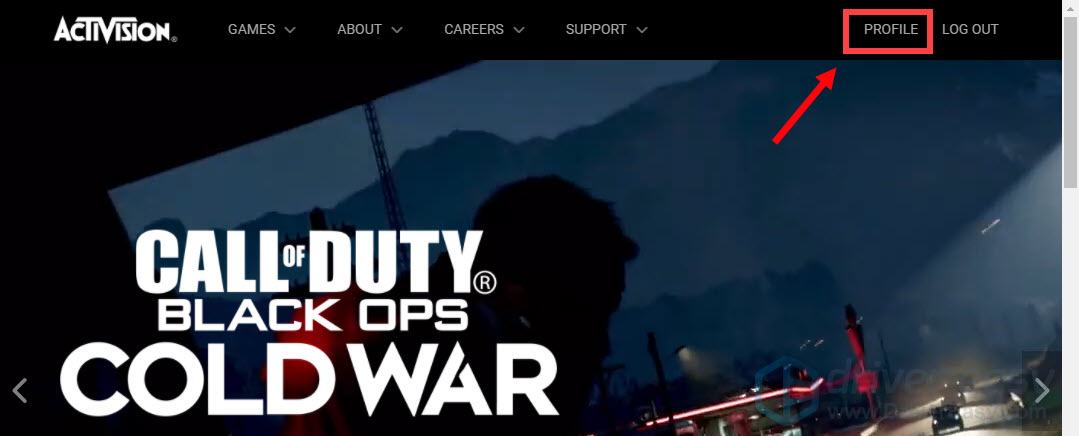
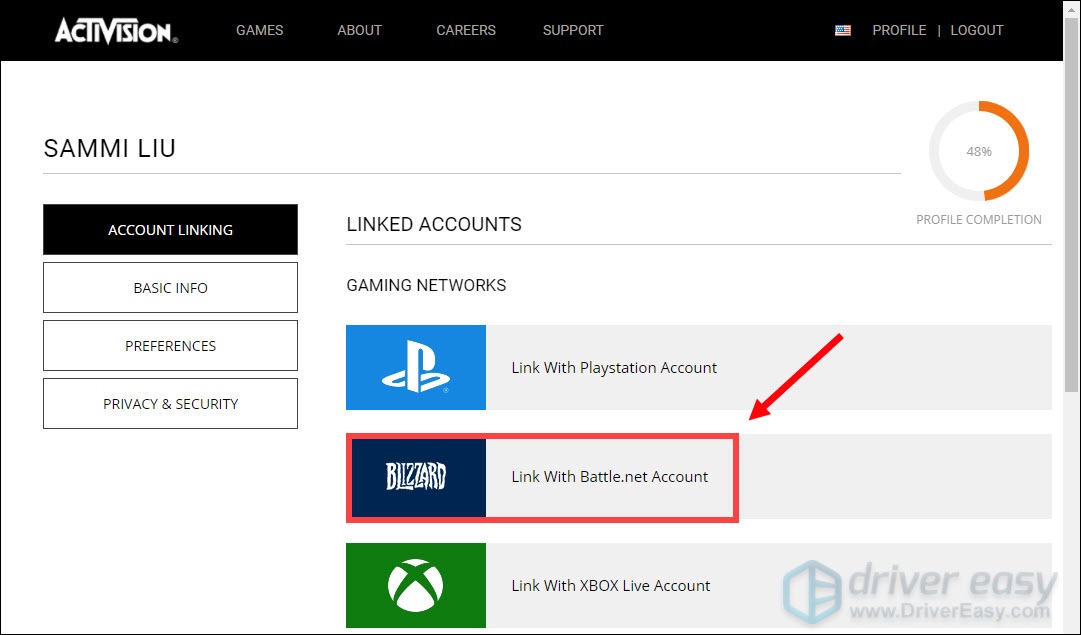
- If you haven’t linked with your Battle.net Account, simply click on it and follow the on-screen instructions to link your account.
After you’ve done these, launch your game and check if you can connect to online services.
Still no luck? Then give VPNs a try. A trustworthy VPN can decrease your ping and thus provide you with a smoother and more enjoyable gaming experience. And by connecting a VPN server to the remote game server, you’re able to avoid bandwidth throttling. But be advised: lots of problems may arise if you use a free VPN. Therefore, to secure your network and maximize your gaming experience, we suggest you use a paid VPN.
Below is the VPN we would like to recommend:
Hopefully, this post helped. If you have any ideas or questions, do not hesitate to leave us a comment below.


