When you’re using your computer, the Blue Screen of Death errors can appear suddenly with stop code: DRIVER VERIFIER IOMANAGER VIOLATION. You must be confused and worried.
Don’t panic, you’re not alone. This article gives you 5 methods to fix the DRIVER VERIFIER IOMANAGER VIOLATION blue screen error.
Before you start:
Restart your computer to the normal mode
The first thing to do when you meet the DRIVER VERIFIER IOMANAGER VIOLATION blue screen error is to restart your computer and back to normal Windows system. You can wait for your PC restart or you can follow the below method to restart manually.
How: Hold your computer’s Power button for about 5 seconds to restart.
If you can’t reboot your computer into normal mode in this way, you can click here to know how to boot into safe mode. After that, restart the computer to see if the system was back to normal.
5 fixes for DRIVER VERIFIER IOMANAGER VIOLATION blue screen error:
Here are 5 solutions for you to try. You may not need to try them all; just work your way down until you find the one that works for you.
- Stop or reset Driver Verifier
- Update your driver
- Repair system files
- Uninstall the newly installed software
- Restore from a restore point
- Reset or reinstall Windows
Method 1: Stop or reset Driver Verifier
Driver Verifier is a built-in tool in every version of Windows operating system. It is designed for catching the drivers which caused the Blue Screen of Death (BSOD) error. But running Driver Verifier could cause the computer to crash. You can stop or reset Driver Verifier to solve this blue screen error.
Stop Driver Verifier:
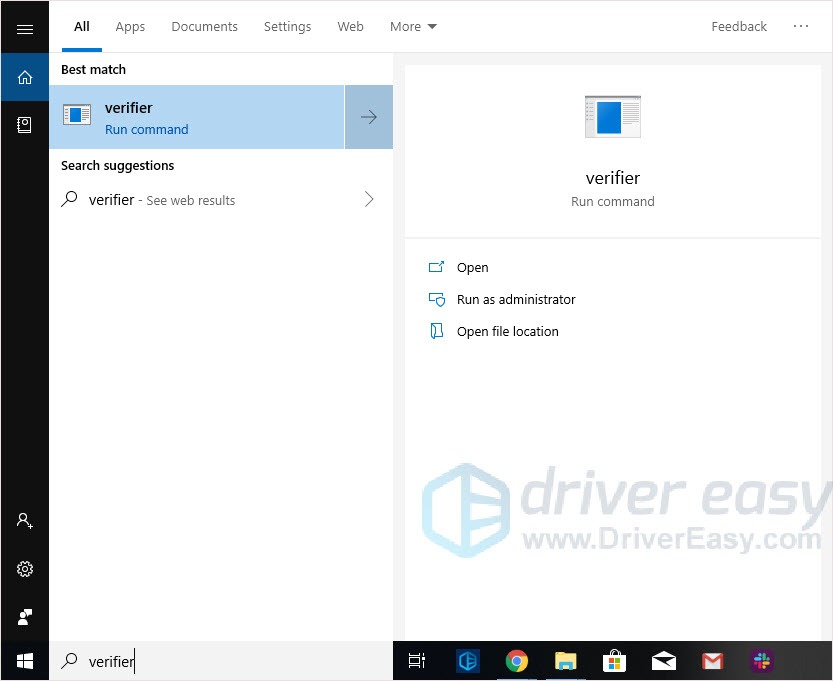
1) Type verifier in the search box and press Enter.
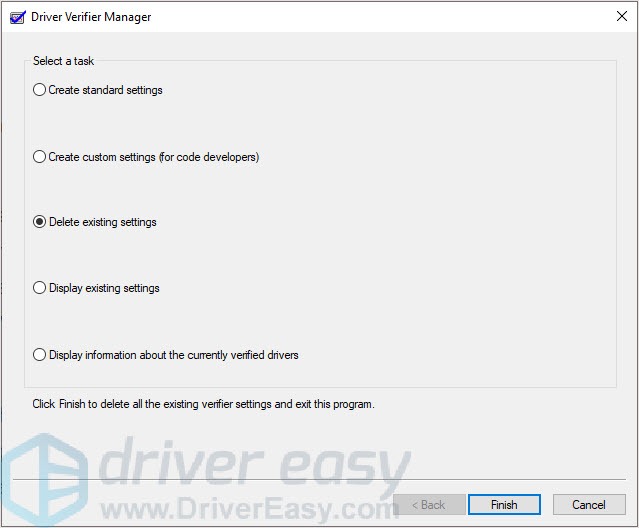
2) Click Delete existing settings and click Finish.
3) Restart your PC.
Reset Driver Verifier:
1) Press the Windows logo key + R together to open the run box.
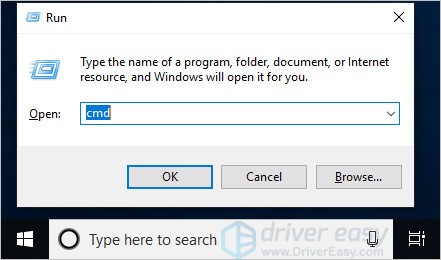
2) Type “cmd” and press Shift+Ctrl+Enter together to open Command Prompt in the administrator mode.
Note: Do NOT click OK or just press the Enter key as that won’t allow you to open Command Prompt in the administrator mode.
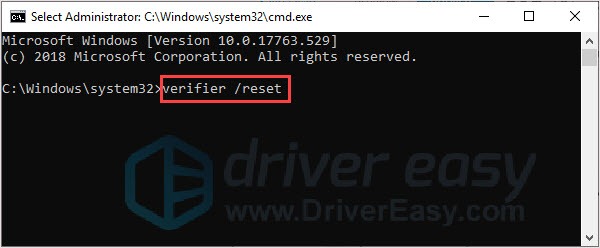
3) Type verifier /reset and press Enter.
Note: There is a space before “/”.
4) Restart your PC.
Method 2: Update your driver
The blue screen error may also be caused by outdated or wrong drivers.
There are two ways you can get the right drivers: manually or automatically.
Manual driver update – You can update your driver manually by going to the manufacturer’s website, and searching for the most recent correct driver. Be sure to choose only drivers that are compatible with your Windows version.
Automatic driver update – If you don’t have the time, patience or computer skills to update your video and monitor drivers manually, you can, instead, do it automatically with Driver Easy. Driver Easy will automatically recognize your system and find the correct drivers for your device, and your Windows version, and it will download and install them correctly:
1) Download and install Driver Easy.
2) Run Driver Easy and click the Scan Now button. Driver Easy will then scan your computer and detect any problem drivers.
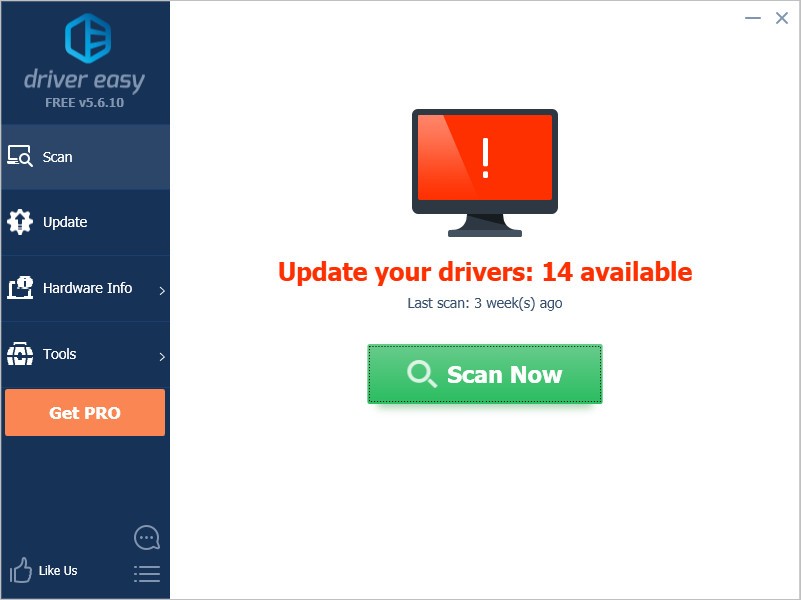
3) Click the Update button next to the selected driver to automatically download the correct version of that driver, then you can manually install it (you can do this with the FREE version).
Or click Update All to automatically download and install the correct version of all the drivers that are missing or out of date on your system. (This requires the Pro version which comes with full support and a 30-day money back guarantee. You’ll be prompted to upgrade when you click Update All.)
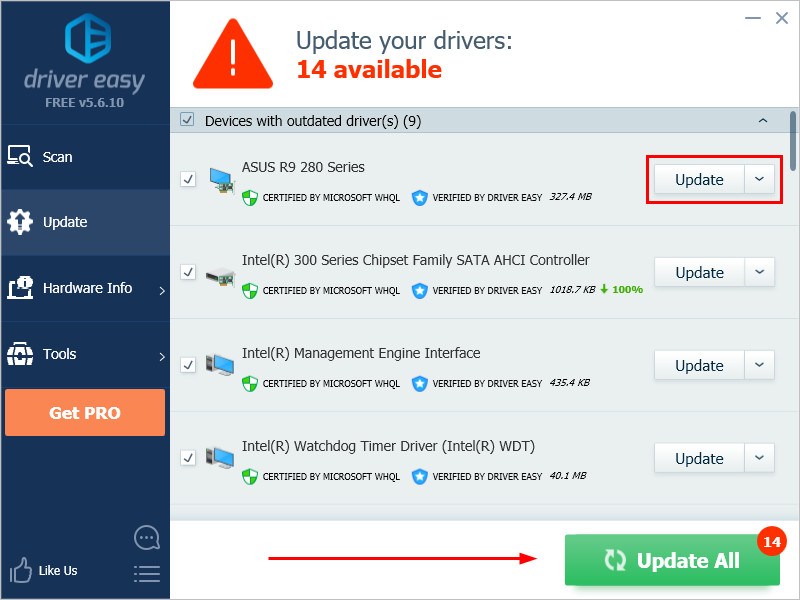
4) Restart your computer and check the blue screen problem is fixed or not.
Method 3: Repair system files
When your computer’s system file was broken or corrupted, it may cause a blue screen error.
There’re 2 ways to solve it.
- Option 1- Automatically (Recommended)
Use a repair tool to check various areas in your computer to determine the cause of Windows common issues. It will deal with issues related to system errors, and critical system files and find the right fix for you. - Option 2 – Manually
System File Checker is a built-in tool to check for corrupt, damaged system files and manage to restore them if there are any. However, this tool can only diagnose major system files, and won’t deal with damaged DLL, Windows Registry key, etc.
Option 1 – Automatically (Recommended)
Fortect is a computer repair software that can diagnose problems on your computer and fix them immediately.
It is tailored to your specific system and is working in a private and automatic way. It will first check hardware-related issues to identify problems, and then security issues, and finally it detects programs that crash, and missing system files. Once complete, it will find a solution to your specific problem.
- Download and install Fortect.
- Open Fortect and click Yes to run a free scan of your PC.
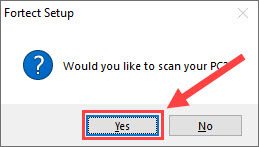
- Fortect will scan your computer thoroughly. This may take a few minutes.
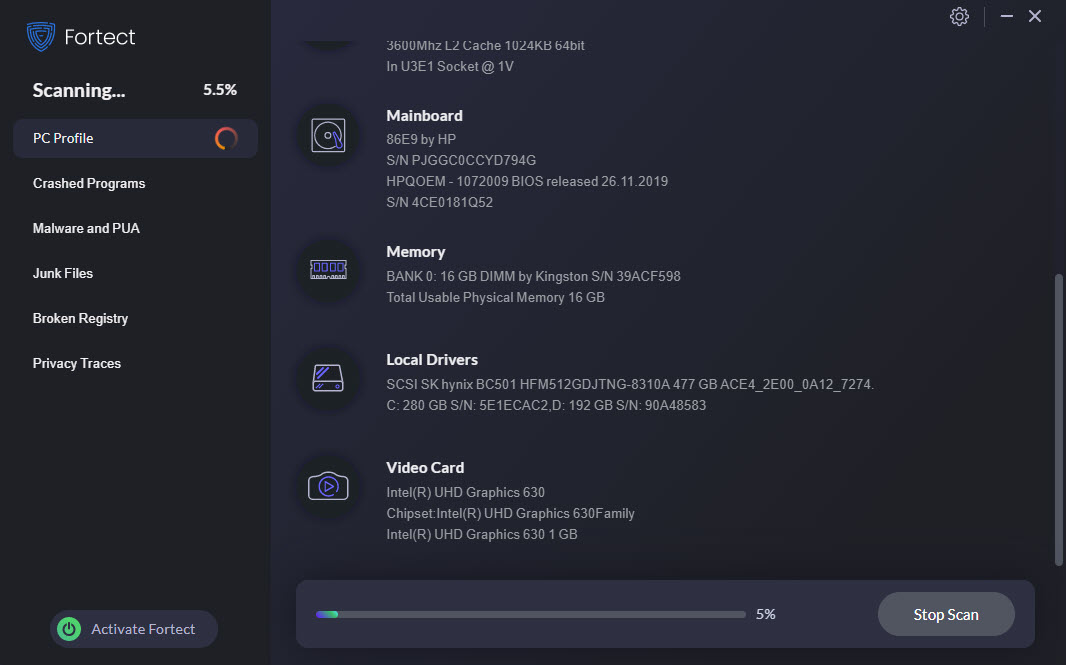
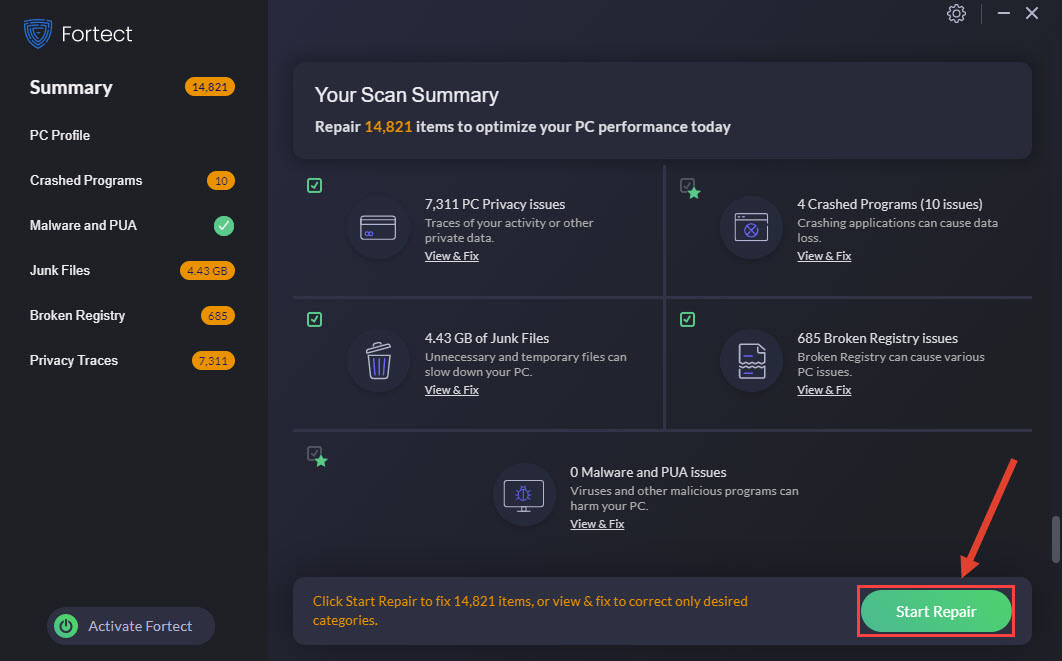
- Once done, you’ll see a detailed report of all the issues on your PC. To fix them automatically, click Start Repair. This requires you to purchase the full version. But don’t worry. If Fortect doesn’t solve the issue, you can request a refund within 60 days.
Email: support@fortect.com
Option 2 – Manually
1) On your keyboard, press the Windows logo key and R key at the same time to invoke the Run box.
2) Type “cmd” and press Shift+Ctrl+Enter together to open Command Prompt in the administrator mode.
Note: Do NOT click OK or just press the Enter key as that won’t allow you to open Command Prompt in the administrator mode.

3) Type “sfc /scannow” in the window and press Enter. Then wait for the verification is 100% complete.

4) Restart your computer to check the blue screen error is fixed or not.
If the result indicates that there are broken files exist but SFC can’t fix it, you can turn to Deployment Image Servicing and Management (DISM) Tool for deeper examination and repair.
Click here for a tutorial on how to use the DISM Tool.
Method 4: Uninstall the newly installed software
Sometimes the third-party software that is not compatible with your system can cause this blue screen error. Uninstalling the newly installed software will resolve this issue.
In the steps below, we use the GALAX GAMER RGB as an example to demonstrate. You can follow the steps to uninstall the newly installed software on your computer.
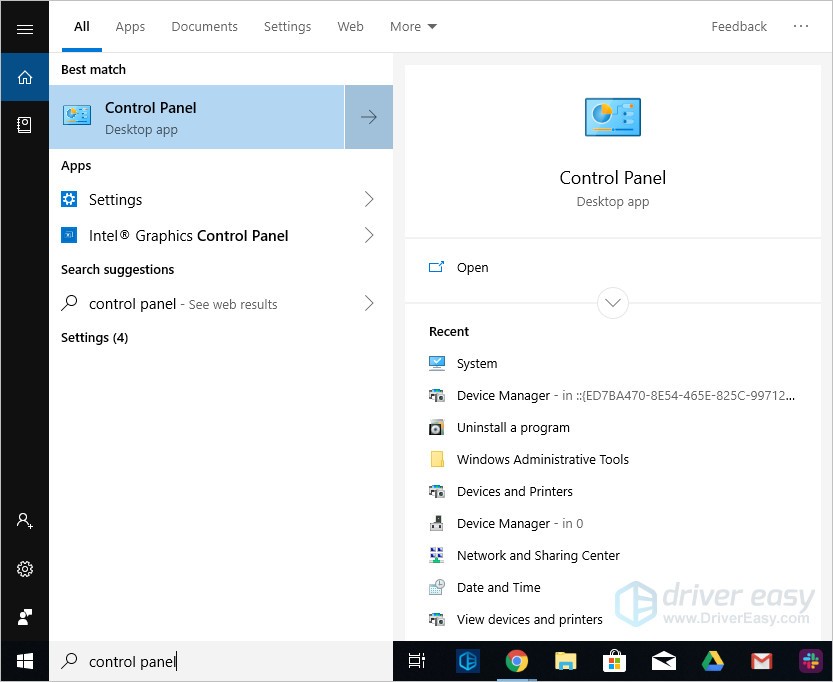
1) Type “control panel” in the search box and click Control Panel.
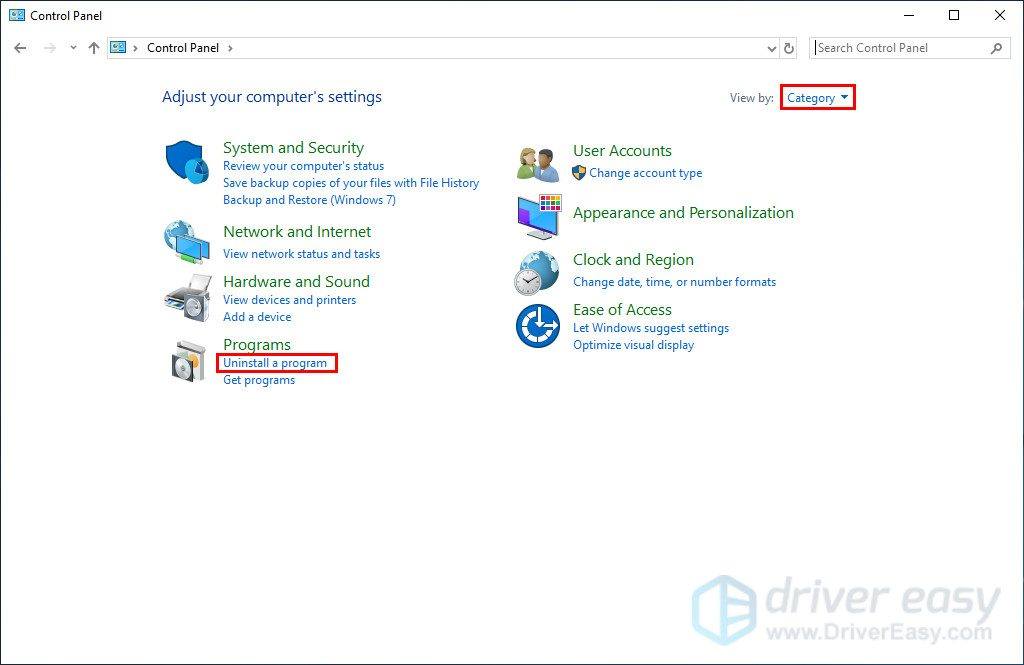
2) Choose to view by Category and then click Uninstall a program.
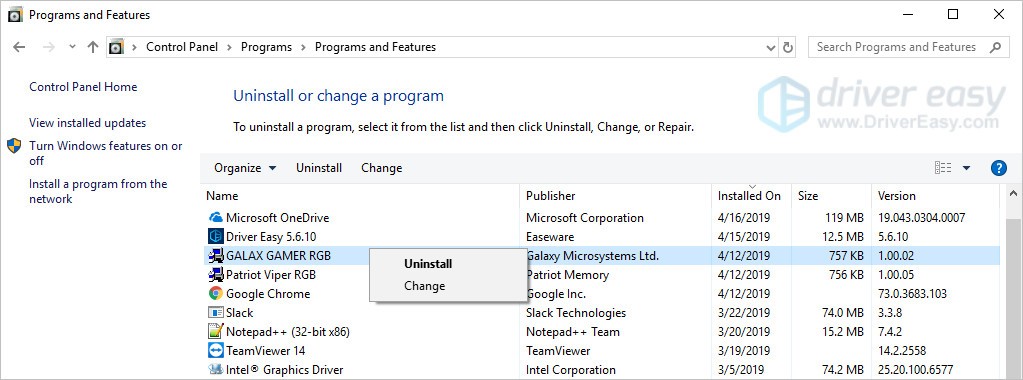
3) Find your newly installed program. Right-click on it and click Uninstall.
4) Follow the on-screen instructions and restart your computer to check the blue screen will appear or not.
Method 5: Restore from a restore point
If you can’t figure out which software or driver cause this blue screen error and your computer was fine a few days ago, you can restore your system back to a previous restore point.
This will roll back all the device drivers and software updates to the condition when you created the restore point.
Click here to learn how to backup files.
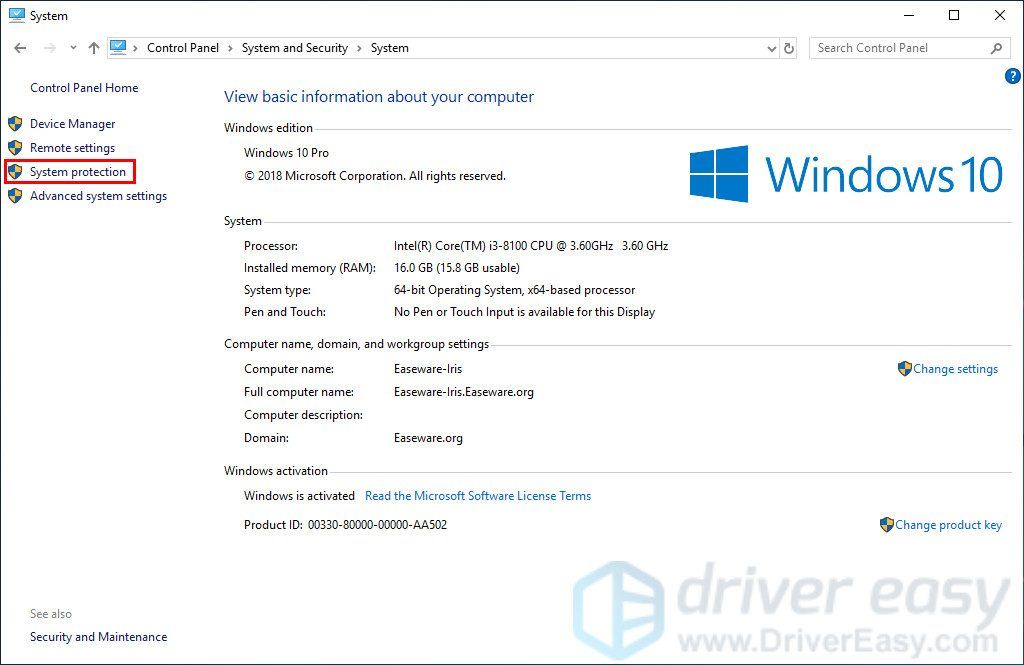
1) On your keyboard, press the Windows logo key + Pause together, then click System protection.
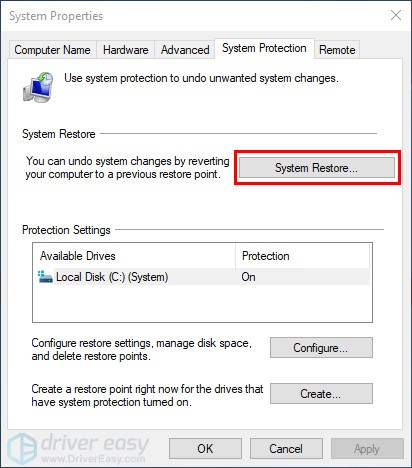
2) Click System Restore.
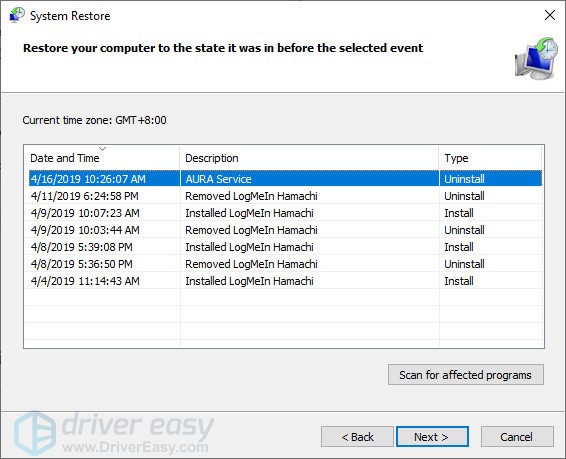
3) Click Next and it will open the below window.
Choose a restore point where the Windows didn’t show any errors. Then follow the on-screen instructions to finish the process.
4) Restart your computer to check the blue screen will appear or not.
Method 6: Reset or reinstall Windows
But treat these options as a last resort, because they both take quite a long time.
Thank you for reading. If you find these methods useful or you like this post, please click Thumb to give us a Like. And you’re welcome to leave comments and questions below.


